Soap Making: Craft Beautiful, Handmade Soaps at Home
Ever dreamed of making your kitchen a personal apothecary? Making your own bath products is a delightful way to show your creativity. You can make items that feel amazing on your skin, using top-quality oils and natural plants.
This hobby turns simple chemistry into beautiful art. Anyone can learn it with a bit of patience. It lets you turn basic ingredients into special items for your daily life. Many find it very calming and a great way to unwind after a long day.

Starting a soap making journey opens up endless creative doors for beginners. This fun handmade soap activity lets you pick every ingredient for your skin. You’ll feel proud of making something useful and pretty from scratch.
Key Takeaways
- Choose your own natural fragrances and colors for every batch.
- Avoid harsh synthetic chemicals often found in store-bought bars.
- Create personalized gifts that friends and family will truly cherish.
- Master a DIY soap project to save money on luxury skincare.
- Enjoy a sustainable and eco-friendly hobby that reduces plastic waste.
- Develop a rewarding skill that combines science with artistic flair.
Why Make Your Own Handmade Soap
Making your own soap lets you avoid harsh chemicals in commercial soaps. This simple act can make your skin healthier and your cleansing more personal.
Benefits of Homemade Soap Over Commercial Bars
Commercial soaps often have harsh detergents and artificial stuff. But, homemade soap uses natural ingredients that are good for your skin. You can pick what goes into your soap, avoiding things that might irritate you.
Homemade soap also keeps in the glycerin, which helps keep your skin moist. This is great for dry or sensitive skin.
Cost Savings and Creative Customization
Making your own soap can save you money. The first time you buy supplies, it might cost a lot. But, making more soap lowers the cost per bar. You can also make your soap your own way, trying out different things.
This freedom lets you make soap that looks and feels good. You can make simple or fancy soap, whatever you like.
Control Over Natural Ingredients for Healthier Skin
When you make your own soap, you choose what’s in it. You can pick natural oils and essential oils that are good for your skin. This way, you make a soap that’s just right for you.
This is especially good for people with skin problems or allergies. You can make soap that’s gentle and helps your skin.
Essential Safety Practices for Soap Making
To make soap safely, you need to follow some rules. Soap making uses lye, which is very dangerous. You must be careful and know what you’re doing.
Working Safely with Lye and Caustic Materials
Lye can burn your skin badly. Always handle lye in a well-ventilated area. Keep it away from kids and pets. When mixing lye with water, always add the lye to the water. This stops a big explosion.
Protective Equipment You Must Wear
Wearing the right gear is key when working with lye. You need protective goggles for your eyes, gloves for your skin, and long-sleeved shirt and pants for your body. A mask helps keep you from breathing in bad smells.
Creating a Safe and Well-Ventilated Workspace
Your workspace needs good air to breathe. Make sure it has good airflow. This keeps bad smells from lye and other stuff away. Keep your area clean and neat to avoid accidents and work better.
By following these safety tips, you can make soap safely. This way, you can enjoy making soap without worrying about getting hurt.
Understanding Soap Making Ingredients and Their Roles
Making handmade soap needs knowing about different ingredients and what they do. The quality of the soap depends on these ingredients.
The Role of Lye in the Saponification Process
Lye, or sodium hydroxide, is key in soap making. It turns oils and fats into soap. It’s important to be careful with lye because it can burn. But, lye is used up in the process and isn’t in the soap.
Choosing the Right Oils and Fats for Your Recipe
Picking the right oils and fats is very important. They give the soap its hardness, lather, and how moisturizing it is. For example, coconut oil makes a hard soap with lots of lather. Olive oil makes a milder soap that moisturizes well. Trying different oils can help you find the perfect mix for your soap.
Water and Alternative Liquid Options
Water is used to mix with lye to make the lye solution. But, you can also use things like herbal teas or goat’s milk. This can make the soap feel different, like softer or with more lather.
Optional Additives and Their Beneficial Properties
You can add things like herbs, essential oils, and exfoliants to your soap. Oatmeal can make the soap soothing. Lavender essential oil can help you relax. These extras let you make soap that’s just right for you and your skin.
Gathering Your Soap Making Equipment and Supplies
Getting ready for soap making is key to making beautiful soaps at home. You need the right tools and supplies for a fun and easy experience.
Essential Tools and Mixing Supplies
You’ll need a stainless steel or heat-resistant plastic pot to mix your soap. A stick blender is important for blending the mix right. You’ll also need mixing bowls and spatulas for getting your ingredients ready.
A scale is crucial for measuring ingredients accurately. Digital scales are best for their exactness. Don’t forget thermometers for checking temperatures and soap making gloves to keep your skin safe.

Molds and Shaping Options for Different Bar Styles
The mold you pick will shape your soap bars. Silicone soap molds are great because they’re flexible and easy to use. You can also use plastic molds or wooden molds lined with parchment paper.
For something different, try unique molds like log molds or molds with cool designs.
Accurate Measuring and Temperature Equipment
Measuring right is key to making your soap just right. You’ll need digital scales and measuring cups. Keeping an eye on temperature is also important. Use thermometers to check the temperature of your mix.
With the right tools and supplies, you’re ready to start making your own soaps. You’ll make high-quality, handmade soaps.
Mastering the Cold Process Soap Making Method
To make beautiful, handmade soaps, you need to know the cold process method. This method mixes oils and lye solution. This mix turns into soap through a chemical reaction called saponification.
Preparing Your Lye Solution Correctly
The first step is to make the lye solution. You must measure lye (sodium hydroxide) and water carefully. Always wear gloves and goggles because lye can burn you.
Make the lye solution in a place with good air. The mix will get hot and make fumes until it cools down.
Mixing Oils and Reaching the Perfect Trace
When the lye solution is ready, mix it with the oils. Keep blending until it gets to trace. At trace, the mix thickens and leaves a trail when you drizzle it.
Getting the mix to the right trace is key. It makes sure the soap is not too soft or too hard.
Pouring into Molds and the Initial Setting Phase
Once it reaches trace, pour the mix into molds. Gently tap the mold to get rid of air bubbles. Then, smooth out the top.
Let the soap set in the mold for 24 to 48 hours. It will start to harden during this time.
Understanding the Saponification Timeline
Saponification is when lye and oils turn into soap. This takes a few weeks. At first, the soap is hard enough to unmold and cut in 24-48 hours.
But it’s still not ready to use. It needs to cure for 4-6 weeks. This lets excess water evaporate and makes the soap milder and harder.
Learning the cold process method lets soap makers try many recipes. They can play with different oils, fragrances, and colors. This way, they make unique and caring soaps.
Exploring Alternative Soap Making Techniques
There are many ways to make soap, not just cold process. Each method has its own benefits and challenges. They help create unique and beautiful soap bars.

Faster Results with Hot Process Soap Making
Hot process soap making is quick. It heats the soap mixture fast. This way, soap makers can use their soap sooner.
Benefits of Hot Process Soap Making: It’s fast. Soap makers can use their soap in just a few days. Cold process soap takes weeks.
But, hot process soap making is tricky. It needs careful temperature and texture control.
Melt and Pour Method for Complete Beginners
The melt and pour method is perfect for beginners. It uses pre-made soap bases. You can add colors, fragrances, and more.
This method is great for beginners. It’s safe and easy. You don’t have to work with lye.
With melt and pour soap, you can make many textures and designs. It’s very creative.
Rebatching and Hand Milling Existing Soap
Rebatching grates and melts existing soap to make new bars. It’s good for using up leftover soap. It also makes unique textures.
Hand milling is similar. It grates and re-mixes soap. Both methods let you try new fragrances and colors.
Advantages of Rebatching and Hand Milling: They’re creative and eco-friendly. They help reduce waste.
Adding Colors, Scents, and Beautiful Textures
Soap making is fun because you can add colors, scents, and textures. This makes your soap special and lets you make gifts that are just right.
Adding different things makes soap look good and smell nice. It’s all about making soap that’s not just useful but also pretty and fragrant.
Natural Colorants and Synthetic Soap Dyes
You can color your soap with natural or synthetic dyes. Natural colorants come from plants and give soft, earthy colors. They’re great for a natural look.
Synthetic soap dyes give bright colors. They’re strong, so a little goes a long way. Make sure to pick dyes made just for soap to keep it safe.
Essential Oils Versus Fragrance Oils for Scenting
You can use essential oils or fragrance oils for scent. Essential oils come from plants and smell natural. But they can be pricey and not last long.
Fragrance oils are man-made and smell like lots of things. They’re cheaper and smell stronger. But some people might not like them.
Exfoliants and Textural Elements to Enhance Your Bars
Adding things like oatmeal, coffee grounds, and sea salt makes soap better. They scrub your skin gently and look nice too.
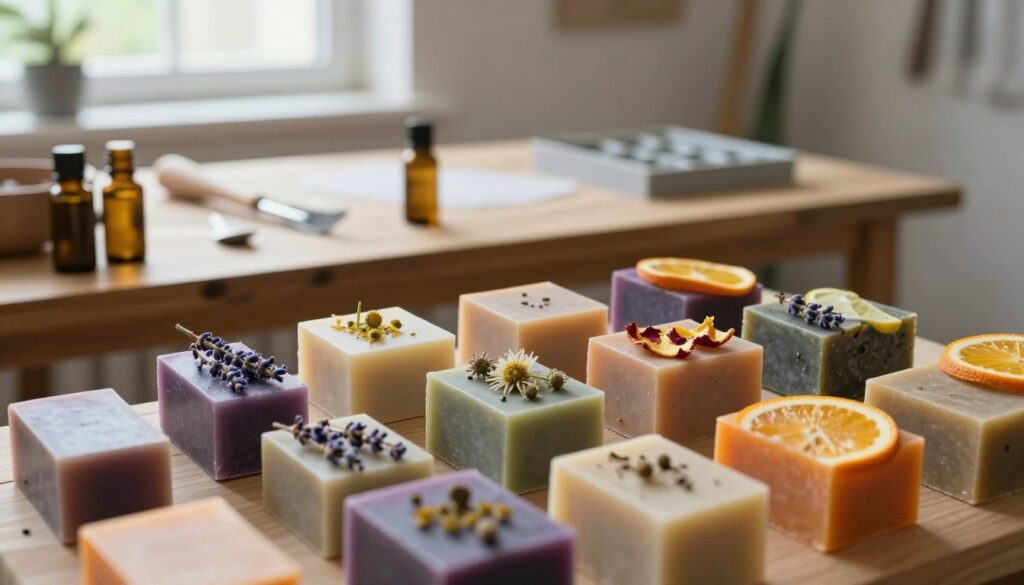
You can also add things like dried herbs or flower petals on top. This makes your soap look pretty and might even help your skin.
Creating Swirls, Layers, and Artistic Patterns
Making your soap look good is part of the fun. You can swirl, layer, and embed to make it artistic. Swirling mixes colors for a marbled look.
Layering means pouring colors in layers. Each layer sets before you add the next. This makes a soap that’s full of color.
Trying new things lets you make soap that’s truly yours. It shows off your style in a beautiful way.
Troubleshooting Common Soap Making Problems
Soap making can sometimes go wrong, but you can fix common problems. Whether you’re new or experienced, you might face issues that affect your soap’s quality.
Dealing with Separation, Seizing, and Acceleration
Separation, seizing, and acceleration are common soap making problems. Separation happens when the lye and oil mix badly, leading to uneven texture. Make sure your ingredients are well mixed and the lye to oil ratio is right.
Seizing is when the soap thickens too fast, making it hard to pour. This can be due to wrong temperatures or too much lye. Keep an eye on your mixture’s temperature and adjust it if needed.
Acceleration is when the soap gets too thick too quickly. You can fix this by tweaking your recipe or working at the right temperature.
Fixing Discoloration and Fading Issues
Discoloration and fading can be a letdown, especially if you’ve added colors. Discoloration can be caused by high temperatures, contamination, or certain ingredients. Use high-quality colorants and keep your workspace clean to avoid this.
Fading can happen from light exposure or some fragrance oils. To stop fading, use UV-resistant packaging or pick fragrance oils that won’t change colors.
Preventing and Addressing Soft or Crumbly Soap
Soft or crumbly soap can come from wrong lye ratios, not curing enough, or too many moisturizers. To avoid soft soap, use the right lye ratio and cure it for the right time.
If your soap is crumbly, it might be from too much superfatting or certain oils. Adjust your recipe to balance hardness and moisturizing.
Curing, Cutting, and Storing Your Handmade Soap
After making your handmade soap, you need to cure, cut, and store it right. These steps are key to making your soap look good and work well on your skin.
The Complete Curing Timeline for Best Results
Curing makes your soap hard and gentle. Let it sit in a place with good air for 4 to 6 weeks. Proper curing makes your soap last longer and feel softer.
While curing, turn the soap bars often. This stops them from getting soft in one spot. A well-cured soap is firmer and lasts longer.
Cutting Techniques for Professional-Looking Bars
Cutting soap bars needs care and patience. Use a sharp cutter or knife for clean cuts. For fancy designs, a soap cutter with a special shape works best. Bars that look the same are more appealing.
Press gently when cutting to avoid breaking. If your soap is too soft, cure it a bit longer. For harder soap, a sharp cutter makes clean edges.
Proper Storage Methods to Extend Shelf Life
Storing your soap right keeps it good for a long time. Keep it in a cool, dry spot, away from sunlight and moisture. Use packaging that lets air in, like paper or cardboard.
Don’t store soap in tight containers or plastic bags. They trap moisture and can make the soap soft or moldy. Storing it right keeps the soap fresh and smelling good.
Conclusion
Soap making is a fun hobby. It lets you make nourishing soap for yourself or as a gift. You can get healthier, more radiant skin by making your own soap.
We’ve looked at soap making in this article. We talked about safety and how to add colors, scents, and textures. Now, you can start making your own soap and enjoy the process.
When you make your own soap, you get to choose what goes into it. You can make it your own way and save money. The best part is the joy of creating something that’s good for your skin.